INTRODUCTION
In this post, we are going to build a full stack web application to detect multiple objects in an image using pre-trained machine learning models. We will be programming the server-side and the client-side using javascript (ES6+) in NodeJs and we will be using TensorFlow for implementing Machine Learning in our application.
Our final application is going to look something like this. We can upload an input image and our app will detect the objects in the image and outputs the final image with objects highlighted by bounding boxes and a label.This post doesn’t require you to have prior experience in Machine Learning :)
TENSORFLOW
Tensorflow is an open-source machine learning library developed by Google. It is particularly focused on training and inference of Deep Neural Networks. It was released under Apache License 2.0 in 2015 and used by Google in production. Google also released a TPU (Tensor Processing Unit) an ASIC (Application Specific Integrated Circuit) in 2016 specifically for Machine Learning and optimized for Tensorflow. It has comprehensive libraries for major programming languages and it can even run inside a browser.
PREREQUISITES
Before we begin let’s setup our environment.
Even though we are going to build our application in NodeJS we need python and the following packages in our machine to use @tensorflow/tfjs-node package which uses the TensorFlow C binary. I have used the following versions on a Ubuntu-based machine.
- Python 3
- g++ (10.2.0)
- make (4.3)
- Node JS (12.7)
Linux users can install the above packages using the following command
apt-get update && apt-get install python -y && apt-get install make -y && apt-get install g++ -y
For windows & mac users please refer the tensorflow official installation guide at tensorflow.org/install
Tensorflow is also available as a docker image in docker hub as tensorflow/tensorflow you can pull the image using docker pull tensorflow/tensorflow
Now we have our environment ready let’s begin.
SERVER
Let’s build our NodeJS server now.
I have used the Express framework for this example.
Let’s create our app using express-generator.
npx express-generator --no-view myapp
If you don’t have express-generator installed just use npx to execute the command
Now let’s cd into our app folder and install the dependencies.
npm i
Now let’s start our application.
npx nodemon
Nodemon will help us restarting our application whenever we make any changes or after a crash making our development process peaceful.
Now we should see this if we hit localhost:3000
Now let’s install the following dependencies for our app.
- Tensorflow
npm i @tensorflow/tfjs-node- CPU version (Recommended for all)
If you have a NVIDIA GPU you can install the CUDA version
npm i @tensorflow/tfjs-node-gpu(only for NVIDIA users)
- NOTE: As I mentioned earlier we need python3, g++ & make in order to install our
tfjs-nodelibrary in our NodeJs app. If you face any error while installing please make sure you have installed all the dependencies mentioned in the PREREQUISITES section.
-
Coco-ssd
As I mentioned earlier we will be using a pre-trained model to detect objects in our images.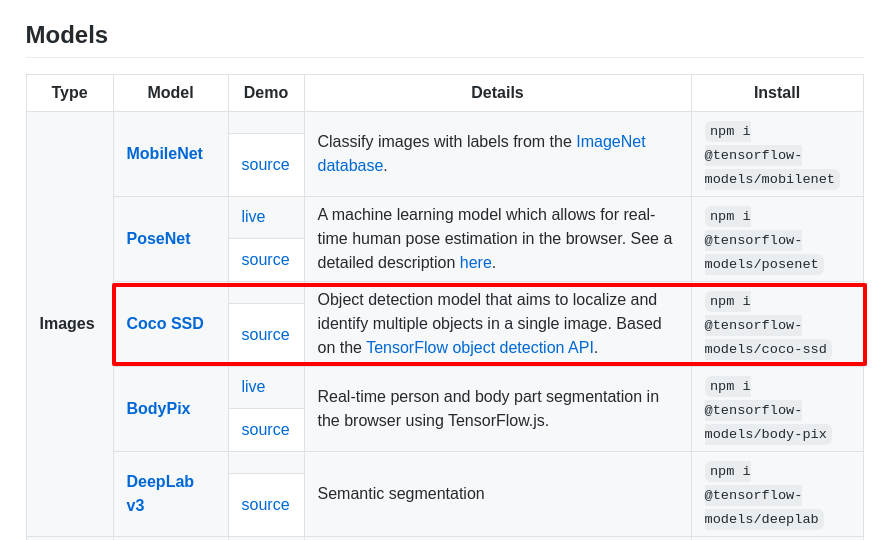 coco-ssd model is capable of detecting multiple objects in a single image/frame.
npm i @tensorflow-models/coco-ssd -
Body Parser
npm i body-parser -
Multer
npm i multer -
Canvas
npm i canvas
Now let’s import our required dependencies and setup our app.js file.
var express = require('express');

var path = require('path');
const bodyParser = require('body-parser');
const multer = require('multer');
const uploadFormData = multer();

var app = express();

app.use(express.json());
app.use(express.urlencoded({ extended: false }));
app.use(bodyParser.json());
app.use(bodyParser.urlencoded({
    extended: true
}));

module.exports = app;
Now let’s create our rest route to handle our image request sent from the Frontend.
-
Create a file object-detection.js inside the Routes folder of our application.
-
Import the file in app.js
const odRouter = require('./routes/object-detection'); -
Create a rest route called predict to handle our request in app.js.
app.use('/predict', uploadFormData.single('image'), odRouter);\
Now let’s edit our object-detection.js file.
Let’s import our dependencies;
const express = require('express');
const router = express.Router();
const canvas = require('canvas');
const tf = require('@tensorflow/tfjs-node-gpu');
const cocoSSd = require('@tensorflow-models/coco-ssd');
Let’s create our route handler with post method.
router.post('/', async (req, res, next) => {
    let image = req.file.buffer;
    let result = await ObjectDetection.run(image);
    res.json(result);
    res.end();
});
our callback function is going to be an asynchronous function because we will be dealing with a lot of promises.
const image = req.file.buffer;
First we are getting our image buffer data from our binary image file.
let result = await ObjectDetection.run(image)
Then we are getting our output from our ObjectDetection.run() method which we will be creating next.
res.json(result);
res.end();
Finally we are returning our response as a JSON.
Now let’s create our ObjectDetection class with three static asynchronous methods.
let ObjectDetection = class {

    static async run() {

    }

    static async predict() {

    }

    static async generateCanvasImage() {

    }
}
The predict() method is going to detect the objects in an image using cocossd model.
The generateCanvasImage() method is going to create the final output image with bounding boxes and labels drawn over our input image.
Let’s code our predict method. Our predict method is going to take in image data and will output the predicted JSON data.Here we will be using the pre-trained cocossd model from Tensorflow.
static async predict(image) {
    let model = await cocoSSd.load();
    image = tf.node.decodeImage(new Uint8Array(image));
    let predictions = await model.detect(image);
    return { predictions: predictions, tfImage: image };
}
let model = await cocoSSd.load();
First, we are loading our cocossd model.
image = tf.node.decodeImage(new Uint8Array(image));
Then we are decoding our image data to a format that Tensorflow can understand. We can use the tf.node.decodeImage() method and pass in our image Data as a Unit8Array.
let predictions = await model.detect(image);
Now we are getting our prediction by passing our Tensor data into model.detect() method.
return { predictions: predictions, tfImage: image };
Finally, we are returning our JSON output with prediction and Tensorflow image data.
We don’t need the Tensorflow image data generally but in our example, I have extracted the width & height of the image while drawing the final canvas from the Tensorflow Image data in generateCanvasImage method.You can completely ignore this if you manage to get the image dimensions by some other means

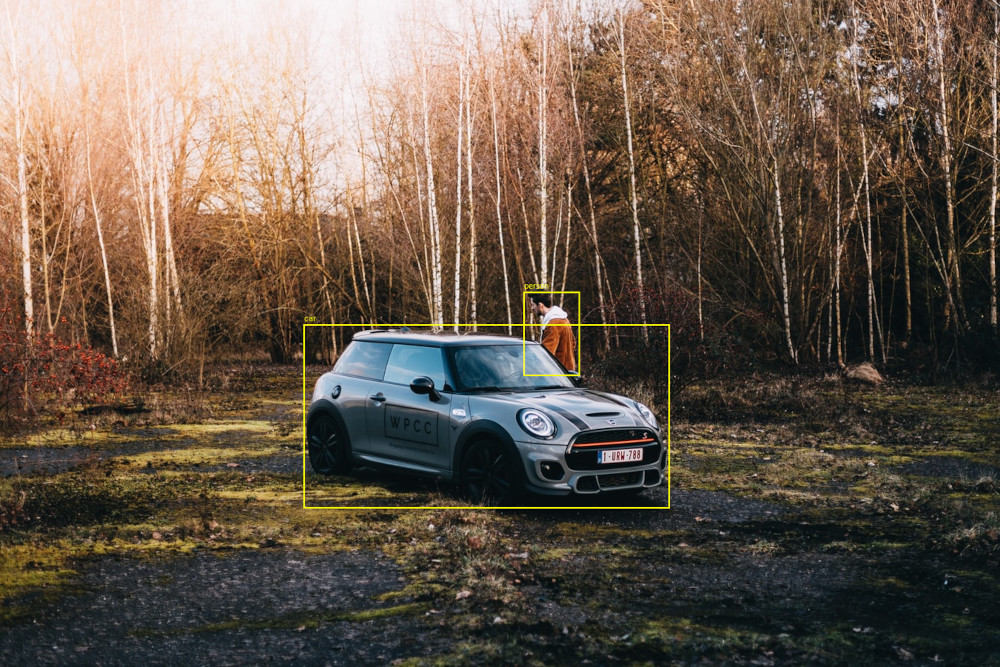
Photo credits : Jonas Denil @ Unsplash
Our output JSON for this predict method will be like this.If we input the above image.
{
  predictions: [
    { bbox: [Array], class: 'car', score: 0.9941698908805847 },
    { bbox: [Array], class: 'person', score: 0.757469654083252 }
  ],
  tfImage: Tensor {
    kept: false,
    isDisposedInternal: false,
    shape: [ 901, 1351, 3 ],
    dtype: 'int32',
    size: 3651753,
    strides: [ 4053, 3 ],
    dataId: {},
    id: 1368,
    rankType: '3',
    scopeId: 1384
  }
}
As we can see the cocossd model has detected 2 objects in our image and returned 3 properties for each object detected.
- bbox (Array)
- class
- score
The bbox array will have the x,y coordinates & width, height values in our image where the object is detected.
[ 410.9481009840965, 438.90460097789764, 493.2163144350052, 246.97146248817444 ]
The class name is the predicted object’s name. In our example, it has detected a car & a person in our image.
Finally, score is the confidence score. In our example, the model has a confidence score of 0.99 for our car and 0.75 for our person. Which are pretty decent confident scores.
Now we have our predict method in place let’s create our generateCanvasImage method to generate our final image with bounding boxes.Cocossd just outputs a Json with a label, bounding box coordinates and a score.We have draw the bounding boxes on the image to get an output as shown in this example.We are going to achieve it using the following method.
static async generateCanvasImage(imageData, width, height, predictions) {
        return new Promise((resolve, reject) => {
            let sourceImage = new canvas.Image;
            sourceImage.src = imageData;
            let imgCanvas = canvas.createCanvas(width, height);
            let context = imgCanvas.getContext("2d");
            context.drawImage(sourceImage, 0, 0, width, height);
            predictions.forEach((prediction) => {
                let coordinates = {};
                coordinates.x = prediction.bbox[0];
                coordinates.y = prediction.bbox[1];
                coordinates.width = prediction.bbox[2];
                coordinates.height = prediction.bbox[3];

                context.beginPath();
                context.fillStyle = 'yellow';
                context.rect(coordinates.x, coordinates.y, coordinates.width, coordinates.height);
                context.lineWidth = 2;
                context.strokeStyle = 'yellow';
                context.stroke();
                context.fillText(prediction.class, coordinates.x, (coordinates.y - 5));
                context.font = "bold 50px";
            });
            resolve(imgCanvas.toDataURL());
        });
    }
Our generateCanvasImage method will accept image data, image width, image height & prediction JSON data and will draw the bounding boxes over our input image, add labels, and will return a promise with the output image.
let sourceImage = new canvas.Image;
sourceImage.src = imageData;
First, we are creating an empty canvas image and assign our image data to our canvas image src.
let imgCanvas = canvas.createCanvas(width, height);
let ctx = imgCanvas.getContext("2d");
ctx.drawImage(sourceImage, 0, 0, width, height);
Now we are a new canvas with our input image’s width and height (These dimensions are from our input image).
Then we are creating a 2d context from our canvas.
Now we can draw our input image’s data in our canvas layer.
Now we have our new canvas layer ready let’s draw the bounding boxes over it.
Our predictions data is going to be an array since it has multiple objects data. Let’s loop over our array and draw each box now.
 predictions.forEach((prediction) => {
    let coordinates = {};
    coordinates.x = prediction.bbox[0];
    coordinates.y = prediction.bbox[1];
    coordinates.width = prediction.bbox[2];
    coordinates.height = prediction.bbox[3];

    context.beginPath();
    context.fillStyle = 'yellow';
    context.rect(coordinates.x, coordinates.y, coordinates.width, coordinates.height);
    context.lineWidth = 2;
    context.strokeStyle = 'yellow';
    context.stroke();
    context.fillText(prediction.class, coordinates.x, (coordinates.y - 5));
    context.font = "bold 50px";
    });
First to avoid confusion let’s create a coordinates object. This coordinates object will have the x, y coordinates, and width & height value. Our coossd model will return these values in a bbox property as we have seen in the predict method section. Let’s assign each value as mentioned above.
Then let’s begin drawing our bounding boxes and labels.
Let’s create our route with post method to handle our request.
context.rect(coordinates.x, coordinates.y, coordinates.width, coordinates.height);
context.rect() method will draw our bounding box and we can pass in our x,y,width & height values.
context.fillText(prediction.class, coordinates.x, (coordinates.y - 5));
To add our label we can use context.fillText() method and pass the text & coordinates.Here I have just given a negative 5 value to y coordinate to make the label appear at the top left of our bounding box.
Then we can style our box & text by adding fillstyle, linewidth, strokestyle, font, etc.Fell free to explore it and add your own styles :)
Finally let’s return our image.
resolve(imgCanvas.toDataURL());
toDataURL will help us return our image data as a base64 string.
Now we have our predict and generateCanvasImage methods ready let’s create a run method to handle our input image and coordinate with these two methods before returning our final image.
static async run(image) {
    let prediction = await this.predict(image);
    let outputImage = await this.generateCanvasImage(image, prediction.tfImage.shape[1], prediction.tfImage.shape[0], prediction.predictions)
    return { image: outputImage };
}
First, we are getting our prediction data from the predict method by passing in our input image data.
Then we are getting our output image by passing in our input image, width, height, and prediction data.
Finally, we are returning our output image;
Now if we post an image to our localhost:3000/predict route as multipart/form-data using any REST client like postman we should get the output image as base64 string.(please note your REST client may not display the output and can say the output is huge because we are returning the entire image as a base64 string).
If we input the previously mentioned image we should get an output like this.
Now let’s build our UI to upload and display our output.
FRONTEND / UI
First, create two files upload.html inside the public folder and upload.js inside the routes folder of our app.
In upload.js file create a route handler to send our Html as a response.
var express = require('express');
var router = express.Router();

router.get('/', (req, res, next) => {
    res.sendFile('upload.html', { root: './public' });
});

module.exports = router;
Then import the file and create a route to display our page in app.js file.
const uploadRouter = require('./routes/upload');
app.use('/', uploadRouter);
NOTE: I am not using any template engine or UI libraries for this example.We are going to create the UI in plain Javascript & Html5
Now let’s build our UI.
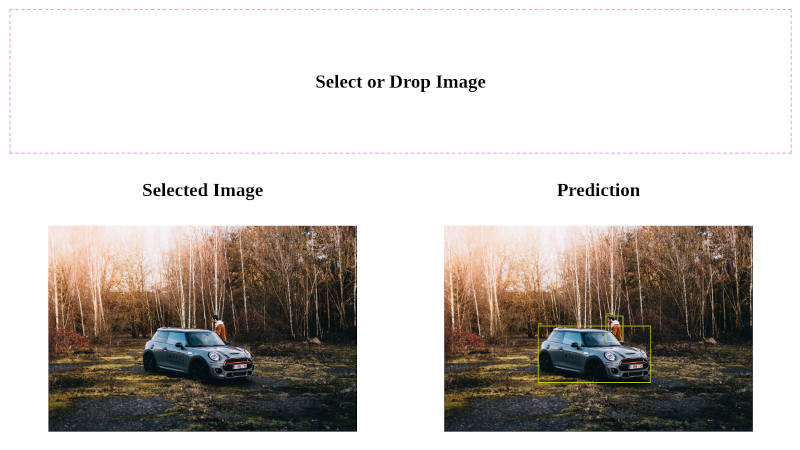
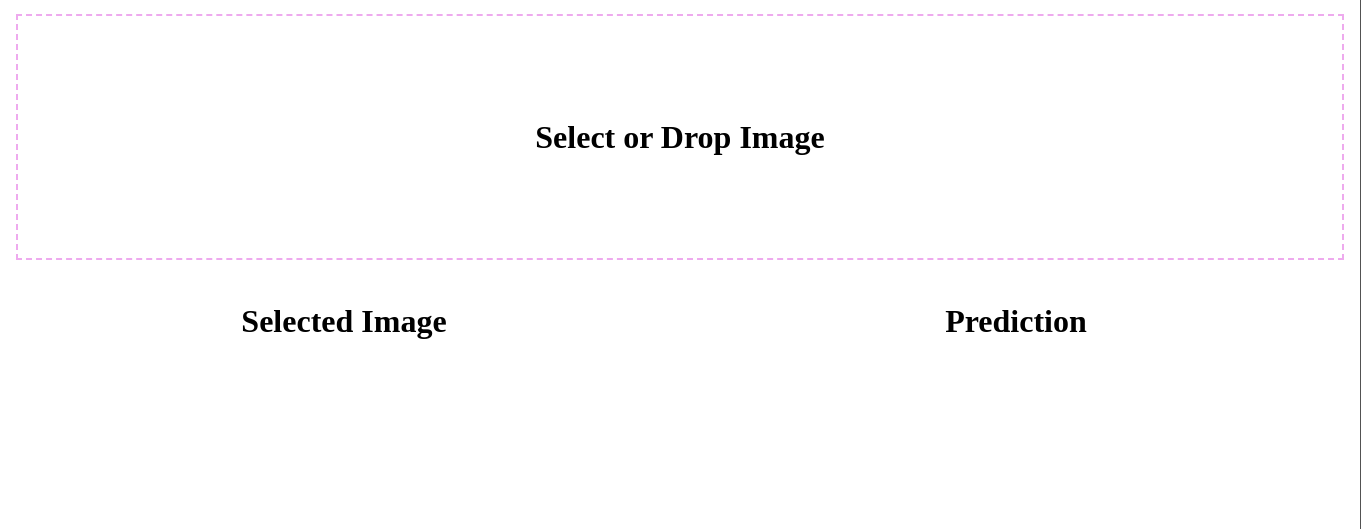
 <div>
    <div id="inputImage">

        <div id="dropArea">

            <div id="dropImage" ondrop="dropImage(event)" ondragover="event.preventDefault()"
                onclick="document.getElementById('selectImage').click();">
                <input style="display: none;" type="file" id="selectImage" onchange="dropImage(event)" />
                <h4>Select or Drop Image</h4>
            </div>

            <div class="grid-row">
                <div>
                    <h4>Selected Image</h4>
                    <img id="dropImagePreview">
                </div>
                <div id="outputImage">
                    <h4>Prediction</h4>
                    <img id="outputImagePreview">
                </div>
            </div>

        </div>

    </div>
</div>
We have three main components here.
- The dropImage area will act as our drag and drop & file picker section for selecting our image.
- The dropImagePreview area to preview our selected image.
- The outputImagePreview area to preview our output image.
Let’s add some styles now.
<style>
    #dropArea {
        width: 100%;
        min-height: 50px;
        text-align: center;
    }

    #dropImage {
        border: dashed 1px #eeaaee;
        padding: 30px;
    }

    #dropArea img,
    #outputImagePreview {
        width: 80%;
        height: auto;
        margin: 0 auto;
    }

    #selectImageFakeButton {
        background: blue;
        padding: 5px;
        border-radius: 5px;
        cursor: pointer;
        color: white;
        border: none;
        box-shadow: 0px 2px 10px rgba(0, 0, 0, 0.2);
    }

    .grid-row {
        display: grid;
        grid-template-columns: repeat(2, 1fr);
        grid-gap: 0.5rem;
    }

    @media only screen and (max-width: 600px) {

        #dropArea img,
        #outputImagePreview {
            width: 90%;
        }

        .grid-row {
            grid-template-columns: repeat(1, 1fr);
            order: -1;
        }
    }
</style>
This is just for demo purpose please feel free to unleash your creativity while styling the ui :)
Now we should have something like this if we hit localhost:3000
Now lets create our necessary functions.
 const dropImage = async (e) => {
    e.preventDefault();
    var data = e.dataTransfer ? e.dataTransfer.files : e.target.files;
    var image = data[0];
    var selectedImage = await readImage(image);
    document.getElementById('dropImagePreview').src = selectedImage;
    if (selectedImage) {
        detect(image);
    }
}

const readImage = (imageData) => {
    return new Promise((resolve, reject) => {
        const fileReader = new FileReader();
        fileReader.readAsDataURL(imageData);
        fileReader.addEventListener("load", () => {
            resolve(fileReader.result);
        });
    });
}

const detect = async (image) => {
    const url = '/predict';
    const formData = new FormData();
    formData.append('image', image);
    let response = await fetch(url, {
        method: 'POST',
        body: formData
    });
    try {
        let res = await response.json();
        console.log(outputImage);
        document.getElementById('outputImagePreview').src = res.image;
    } catch (error) {
        alert(response.status);
    }
}
Le’s understand each function now.
 const dropImage = async (e) => {
    e.preventDefault();
    var data = e.dataTransfer ? e.dataTransfer.files : e.target.files;
    var image = data[0];
    var selectedImage = await readImage(image);
    document.getElementById('dropImagePreview').src = selectedImage;
    if (selectedImage) {
        detect(image);
    }
}
This will help us handle our selected image. Whenever the user drag n drops or browse and picks up an image our ondrop() or onchange() events will call this function.
This will pass the image data to readImage and will get the output and sets the value as img src in dropImagePreview element.So we can see the preview of our selected Image. Then it will call the detect function to send our request to our server.
const readImage = (imageData) => {
    return new Promise((resolve, reject) => {
        const fileReader = new FileReader();
        fileReader.readAsDataURL(imageData);
        fileReader.addEventListener("load", () => {
            resolve(fileReader.result);
        });
    });
}
This readImage helper function will help us to read the image data from the file and return a promise as a base64 string which we can pass on to our img tag’s src for previewing the image.
const detect = async (image) => {
    const url = '/predict';
    const formData = new FormData();
    formData.append('image', image);
    let response = await fetch(url, {
        method: 'POST',
        body: formData
    });
    try {
        let res = await response.json();
        console.log(outputImage);
        document.getElementById('outputImagePreview').src = res.image;
    } catch (error) {
        alert(response.status);
    }
}
Finally, our detect function will take an image as an input and invokes our REST call.
We are creating a new FormData and appending our image with a key-value as image which we have set in our multer configuration in our server’s app.js file. (NOTE: If this key-value mismatches our server will not read our image).
Then we are invoking the fetch call with method post and form data.
Here I am using the fetch api to invoke the post call since it’s supported by all modern browsers.We don’t need Axios or any third-party libraries anymore to achieve this but if you want to use Axios please feel free to use it.
Then we are creating a try catch block to resolve the promise from the server.Finally after receiving the response we are setting it as an img src in our outputImagePreview element.
Finally, our app is ready and it is waiting for you to upload an image to predict the objects.